Why Is PP Not Good With Ultrasonic Welding?
Feb 26, 2022
Procedure for production use
A: Preparation:
1, check the whole mechanical and electrical source, all normal can be put into use.
2. Check whether there is oxide on the contact surface between the ultrasonic welding mold (welding head) and the amplifier, and clean it.
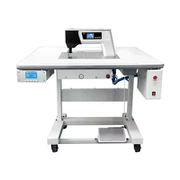
B: Installation of ultrasonic welder mold (welding head) :
1, loosen the screws on the movable frame cover and take out the ultrasonic transducer kit;
2. Install the required ultrasonic welding head) on the amplifier of the transducer kit (tightening torque is about 220 pounds);
3, put the transducer kit back into the movable frame (and close the lid), adjust the direction of the ultrasonic welding tool head (choose the direction of easy to work), lock the screw above the movable frame cover, of course, to adjust the frame to a safe height in advance (ultrasonic mold falling stroke limit is higher than the table);
C: Ultrasonic welding head natural frequency and ultrasonic welder machine output frequency matching detection:
Ultrasonic mold (welding head) in the suspended state, briefly press (point) ultrasonic test switch to release ultrasonic, and at the same time gradually adjust the frequency tuning knob, until find the pointer swing amplitude is the minimum position (that is, the best tuning position). Note: it is advisable to avoid the limit of both ends of the rotation range of the tuning knob when the swing range of the pointer is not more than "2".
D: Rack height adjustment:
1. Adjust the air pressure to a position higher than 1.5kg pressure (20PS);
2, press an ultrasonic welding mold drop switch, self-lock (welding head drop indicator light) position; "The falling state of ultrasonic mold (welding head) at this time"
3, the ultrasonic bottom mold (first put plastic parts into the bottom mold) on the ultrasonic mold (welding head) below the work table, loosen the lock handle of the frame;
4, shake the motor highly adjust the handwheel, so that the ultrasonic mold (welding head) and plastic parts of the top surface of the conflict; Lock the frame and secure the bottom die with splints.
5, drop stroke adjustment (limit) screw lift back 1~ 2mm, and lock screw with nut.
6. Press the ultrasonic mold drop switch again to cancel the position of self-lock (welding head drop indicator light goes out). "At this time, the ultrasonic mold (welding head) returns to the suspended state"
E: Time parameter setting: Main points: trigger in advance; Do not delay welding; Keep cooling as short as possible.
Initial selection of welding time (approx. 0.3 SEC) and holding pressure (cooling) time (0 SEC - except for slow setting plastics)
1, the setting of the hair time: according to the stroke and speed of the ultrasonic mold (welding head) falling to determine the specific time, the purpose is to make the ultrasonic mold (welding head) falling, the moment before the ultrasonic when the plastic parts.
2, the setting of the connection time: according to the 'pressure size of the plastic parts' and' the effect of welding 'to determine; {for example: 1, if the welding mouth plastic material 'splash fly' that 'welding time' is too long or too much pressure or 'fall stroke adjustment (limit) screw' adjusted too low; If the welding melting is not enough, it happens to be the opposite of the former. 2, if the paragraphs on welding mouth melting inconsistent, said paragraphs by pressure is different, it may be pressure on the low side, and the plastic deformation is more, by high pressure test, ultrasonic bottom die or ' 'can't make two half pieces of plastic cannot perfectly, can use tape to the location of the' ultrasonic bottom die 'lack of molten is relatively high, Repeat the test to achieve the best welding effect}.
3, special attention should be paid to: in the case of "welding time" and "falling stroke adjustment (limit) screw position" are unchanged, adjust the pressure value of the pressure cutting, can also change the effect of welding. Therefore, in the normal use of the process, it is necessary to keep the pressure of the pressure source higher than the set pressure value.
4, pressure (cooling) time setting: such as plastic parts "no deformation" "no internal stress after welding" "solidification is not very slow", usually do not select the cooling time value (or only take 1/5 seconds).
E: After passing the quality inspection of the test welding product, lock the variable parameter values everywhere, and then it can be put into high-efficiency production.